Fresh out of the oven
 They say there are two kinds of people in the world: those who can paint and those who can’t. After years of botched paint jobs, I finally embraced the fact that I am deeply rooted in the “those who can’t” group. Luckily, there is hope for all of us non-painters, and it is called powdercoating. Instead of a liquid-based paint, which can run and drip, powdercoating is just what the name implies, a dry powder. An electrostatic charge (think static electricity) is used to hold the powder to the part that is sprayed from a special gun using compressed air. Heat is then used to flow or melt the powder into a smooth skin. The result is a finish that is up to 10 times more durable than liquid coatings and resists most chemicals, fuels, UV light, acids, thinners, and brake fluid. The tooling needed is fairly minimal, basically just a powdercoat gun, an air compressor, and an oven. Companies like Eastwood sell powdercoating guns for under $100 as well as many colors of powder for about $20 a pound. You may be tempted to use your kitchen oven to cure your parts, but I would recommend picking up a cheap used oven from craigslist just to be on the safe side. One thing to keep in mind is that you will be spraying dry powder around your shop with compressed air, so you’ll want to devise a way to contain the powder during application or you’ll be doing a lot of cleaning up afterwards.

STEP 1
Thoroughly degrease the part with lacquer thinner. Make sure you are in a well-ventilated location and wearing gloves during this process.
STEP 2
Strip the part down to bare metal. This can be accomplished either with a blasting cabinet or by using chemical strippers. Make sure that any rust on the part is completely removed.
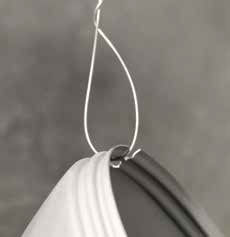
STEP 3
Suspend the part from a length of bare wire. The wire must be clean (no rust or paint) to allow the part to be grounded electrically.

STEP 4
Bake the part in an oven at 400 degrees for 30 minutes to purge any remaining grease or oil that may have seeped into pores or joints. Turn off the oven and allow the part to cool to room temperature.

STEP 5
Wipe down the part with lacquer thinner, checking for grease or oil that was purged while in the oven. Make sure you are in a well-ventilated location and wearing gloves during this process. If oil or grease is found, repeat Steps 4 and 5 until the part comes out of the oven clean.

STEP 6
Mask off any areas you do not want coated using high-temperature tape and plug any threaded holes with high-temperature silicone plugs.

STEP 7
Connect your powdercoat gun to a compressed air source and set the pressure to 8 psi. Make sure to use a filter so the air is moisture- and oil-free.

STEP 8
Connect the grounding clamp to the bare wire that suspends your part.

STEP 9
Depress the activation switch to energize the gun. Remember to keep depressing the switch while you are spraying the powder.

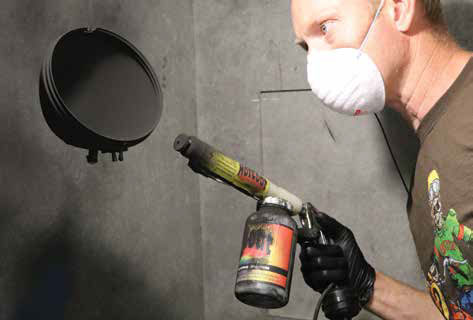
STEP 10
Pull the trigger on the gun to spray the powder onto the part, keeping the tip of the gun approximately 4″ away from the part. Just like with painting, make sure to coat the entire part evenly with powder. Make sure to wear a dust mask so you don’t inhale the powder during application.

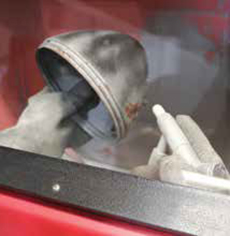
STEP 11
Bake the part at 450 degrees, checking every five minutes to see if the powder has flowed out or glossed over. This process is not always uniform, so make sure the powder has flowed out over the entire part before moving to the next step. A wireless infrared thermometer allows you to keep an eye on the temperature more accurately than the oven’s gauge.

STEP 12
Once the powder has flowed out, turn the oven down to 400 degrees and allow the part to cure for 20 minutes.

STEP 13
Turn off the oven and allow the part to cool to room temperature. Two coats of powder are recommended to make sure all cracks and crevices are covered. Repeat steps 8-12 for a second coat
