

Assemble and install a S&S manifold, Super E or G carb, and its iconic Teardrop air cleaner
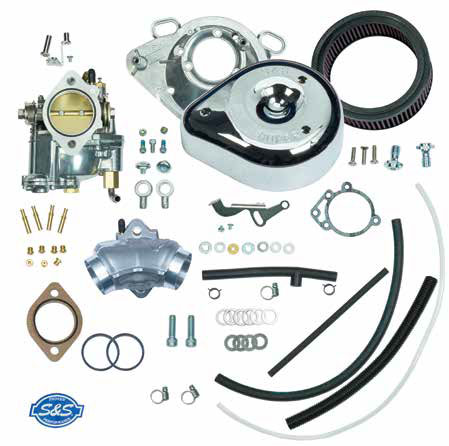 The S&S Teardrop is one of the most recognizable air cleaners in the industry, having been in production for decades. I installed Teardrop air cleaners on many Harleys when I had my custom shop back in the early 1980s. In fact, that teardrop shape is a registered trademark of S&S Cycle. A genuine S&S Teardrop air cleaner has a uniquely designed backplate with an air horn-style radiused entryway into the carb and a dimpled cover with an air directional cone on the inside. These two design features help maximize airflow by giving incoming air an efficient, easy path into the bore of the carburetor.
As for the S&S Shorty carburetors, which come in the 1-7/8″ bore Super E and 2-1/16″ bore Super G versions, it’s one of the easiest carbs to install and tune. I can attest to that since I’ve had Super E setups on many of my personal bikes over the decades and still do. The Super E can be used on any displacement Big Twin or Sportster engine. However, the Super G should only be used on 100″ or larger modified engines. Both the E and G carbs use the standard H-D dual throttle cable setup for safe operation and easy installation since the S&S complete kits are a direct replacement for the stock intake system. Both Super versions have a fixed changeable air bleed jet, two fixed changeable fuel jets (main and intermediate), an O-ring-sealed adjustable idle mixture jet for better performance, and an adjustable accelerator pump for excellent throttle response and easy starting. A variable position enrichment device is also provided for easy starting.
Even though both the Super E and G carbs have multiple adjustments available for professional tuners, almost all installations require that you only dial in the idle mixture setting and the idle speed. These two tasks require a small flat-bladed screwdriver and an engine at operating temperature. That’s because when you order your carb the crew at S&S will want to know what bike the carb is for, the size of the engine, and what modifications the engine has. When your Super arrives, it will come already properly jetted and adjusted. It’ll also come with a main jet one size larger and one size smaller than what is in the carb just in case you need to change it, which is rare. No worries there, either, since it’s easy to change the main jet through a plug in the bottom of the carb, which can be accomplished with everything still mounted to the engine.
You can buy a Teardrop air cleaner or Super E or G carburetor separately or in a complete kit that comes with an intake manifold for stock length cylinders (manifolds for taller cylinders are also available) and everything you need to go from no intake system on the engine to ready to ride including detailed, well-written instructions.
We’re going to show you how easy it is to install a complete Super E setup (#11-0419/$609.95) that fits 1993-99 Evo Big Twins and 1991- 2003 Evo Sportsters. (When used on Sportsters, this kit must be used with a 3/8″-thick #16-0497 or #16-0498 insulator block.) The same procedure is followed on any Twin Cam or Milwaukee-Eight Big Twin or later model Sportster. On earlier-style Evos, Ironhead Sportsters, Shovelheads, Panheads, or Knuckleheads, the process is basically the same except you’re not using breathers that go into the heads, which actually makes the installation easier. That said, check out the accompanying photos and captions to see how easy it is to literally bolt on a complete S&S intake system.
STEP 1
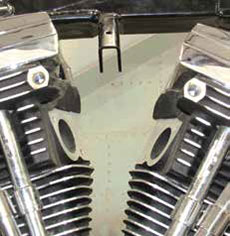
Our 1993 and later Evo engine has the entire stock intake system removed. We’ve also removed the fuel tanks and top engine mount for easier access, but you may not need to remove yours.
STEP 2
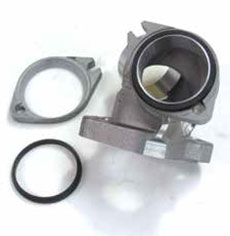
With the stock intake manifold clamps — there’s a front (F) and rear (R) clamp — on the new S&S intake manifold with their tapered side facing out, slip on the S&S manifold seals with their tapered side facing in.
STEP 3
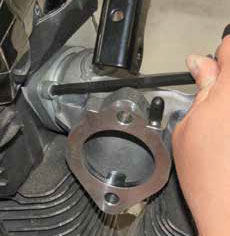
Secure the S&S manifold to the heads using the four stock bolts, blue Loctite, and a 1/4″ Allen. Leave the bolts a little loose for now. Torque them to 95-100 in-lbs. after the air cleaner backplate is secured to the heads.
STEP 4
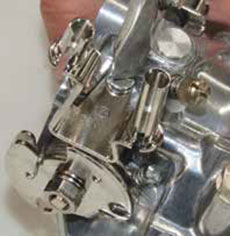
Place the cable guide (there are two styles) onto the carb so it fits into its groove and the stud on the carb fits into its hole in the guide. Secure the guide using the S&S screw, blue Loctite, and a #2 flat-bladed screwdriver.
STEP 5
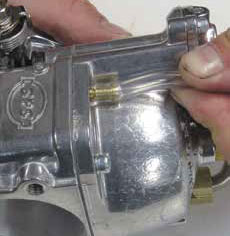
Slip the supplied float bowl drain tube onto its fitting on the underside of the carburetor.
STEP 6
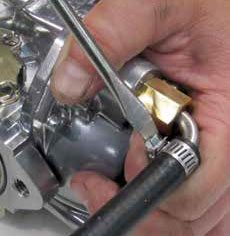
After sliding the S&S black shielding over the S&S fuel line, use the S&S-supplied clamp and a #2 flat-bladed screwdriver to secure the fuel line to the fuel inlet tube on the bottom of the carb.
STEP 7
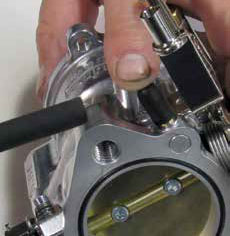
If your bike uses a VOES device, slide the S&S VOES hose over its fitting on the top of the carb. If your bike is not equipped with VOES, slip the S&S plug over the fitting, like we did, to prevent an air leak.

STEP 8
Attach the bike’s two carburetor cables to the carb’s cable wheel. The idle control cable, the one with the spring, goes in the rear cable guide and the throttle control cable goes in the front one.
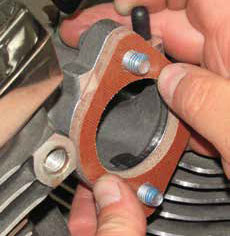
STEP 9
After putting some blue Loctite onto the two S&S bolts, position the bolts in the S&S intake manifold and then slip the S&S insulator block over the bolts with the O-ring side against the intake manifold.
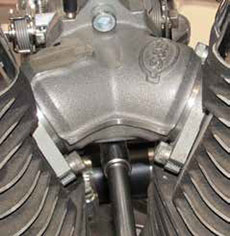
STEP 10
After positioning the carb onto the two bolts, tighten the bolts to 20 ft-lbs. using a 5/16″ Allen.
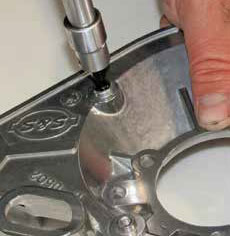
STEP 11
Since this assembly is going onto a 1993 and later Big Twin with head breathers, use a 3/16″ Allen and blue Loctite to install both S&S-supplied plugs into the back of the S&S backplate.
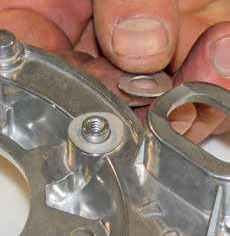
STEP 12
With the S&S wave washer (arrow) on the backplate mounting boss, slip the S&S steel washer on top of the wave washer and over the mounting boss.
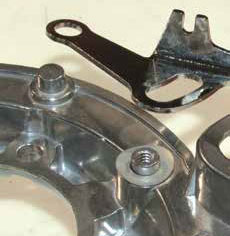
STEP 13
Then slip the pivoting end of the S&S fast idle lever over its mounting boss on the backplate and the lever’s slot on top of the steel washer and its mounting boss.
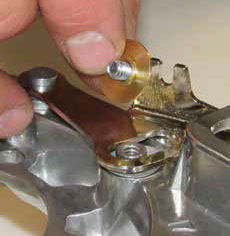
STEP 14
Place the S&S brass washer onto the S&S-supplied screw with its flat side against the screw’s head. Then install the screw/washer using a #2 flat-bladed screwdriver; don’t use any Loctite.
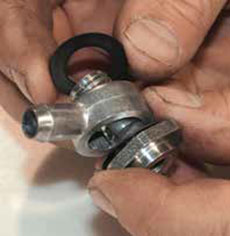
STEP 15
Put a S&S black washer over one of S&S breather bolts, followed by the S&S breather fitting (shouldered side against the breather bolt head), followed by another black washer.
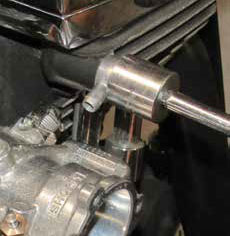
STEP 16
After loosely securing the breather setup you just assembled to the heads using a 7/8″ socket (they’ll be tightened to 15-20 ft-lbs. later) do the same with the other breather components.
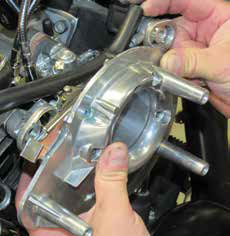
STEP 17
Install the S&S breather hose onto the backplate and position the backplate onto the carb so you can cut the breather hose to size. Then remove and cut the hose to the proper size using a razor.
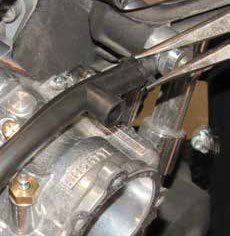
STEP 18
Secure the trimmed hose to the breather assemblies using the two S&S spring clamps and a needlenose pliers. Then torque both breather assemblies to 15-20 ft-lbs. using a 7/8″ socket.
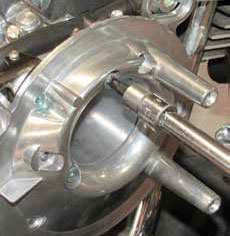
STEP 19
With the S&S gasket between the backplate and carb, and the enrichment lever engaged with its plunger on the carb, secure the backplate to the carb using the three S&S bolts, blue Loctite (a must!), and a 3/16″ Allen. Torque the bolts to 5-7 ft-lbs.
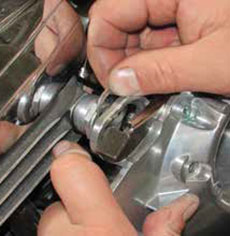
STEP 20
Slide different size S&S-supplied shims between the mounting ears of the backplate and the breather assemblies to see which shim will best fill the gap between them.

STEP 21
With the correct shims in place, secure the backplate mounting ears to their breather assemblies using the two S&S screws and a 1/4″ Allen (no Loctite). Torque them to 8-12 ft-lbs.
STEP 22
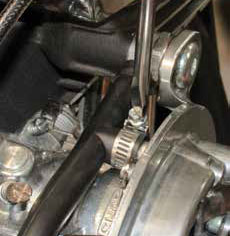
Secure the T of the breather hose to the backplate using the S&S hose clamp and a #2 flat-bladed screwdriver. Then torque the four intake manifold bolts to 95-100 in-lbs. using a 1/4″Allen.
STEP 23
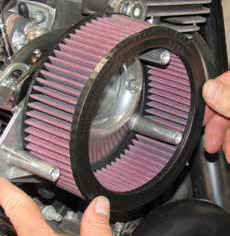
The S&S air filter is then slipped onto the backplate.
STEP 24
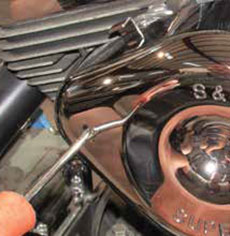
The chrome Teardrop air cleaner cover is then installed using the three S&S countersunk bolts and a #2 Phillips screwdriver.
STEP 25
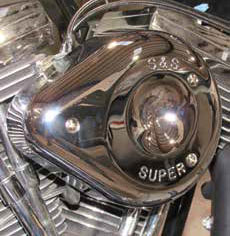
Here’s how the S&S carburetor and Teardrop air cleaner look fully installed!
